
Black and White to Color.. Space Color!
/Whenever you look at those Awesome Hubble Deep Sky Images you may not realize it but you are looking at heavily processed images. Real images, nonetheless.
There are full color one-shot astrophotography cameras and there are DSLR sensor conversions to optimize DSLR’s for astrophotography but by and large the majority of the serious Astro-Imagers aren’t shooting in color, strictly speaking.
In order to get a color image they typically color-composite a vast number of exposures shot through color filters. This isn’t as crazy as it sounds. In fact, unbeknownst to the average user many DSLR’s use a similar process by employing the use of a Bayer Filter Mosaic on the imaging sensor itself.
Applied to astrophotography where CCD’s often still rule the roost because of predictable (correctable) noise patterns related to environmental conditions, this isn’t as complicated as it sounds.
It goes something like this.
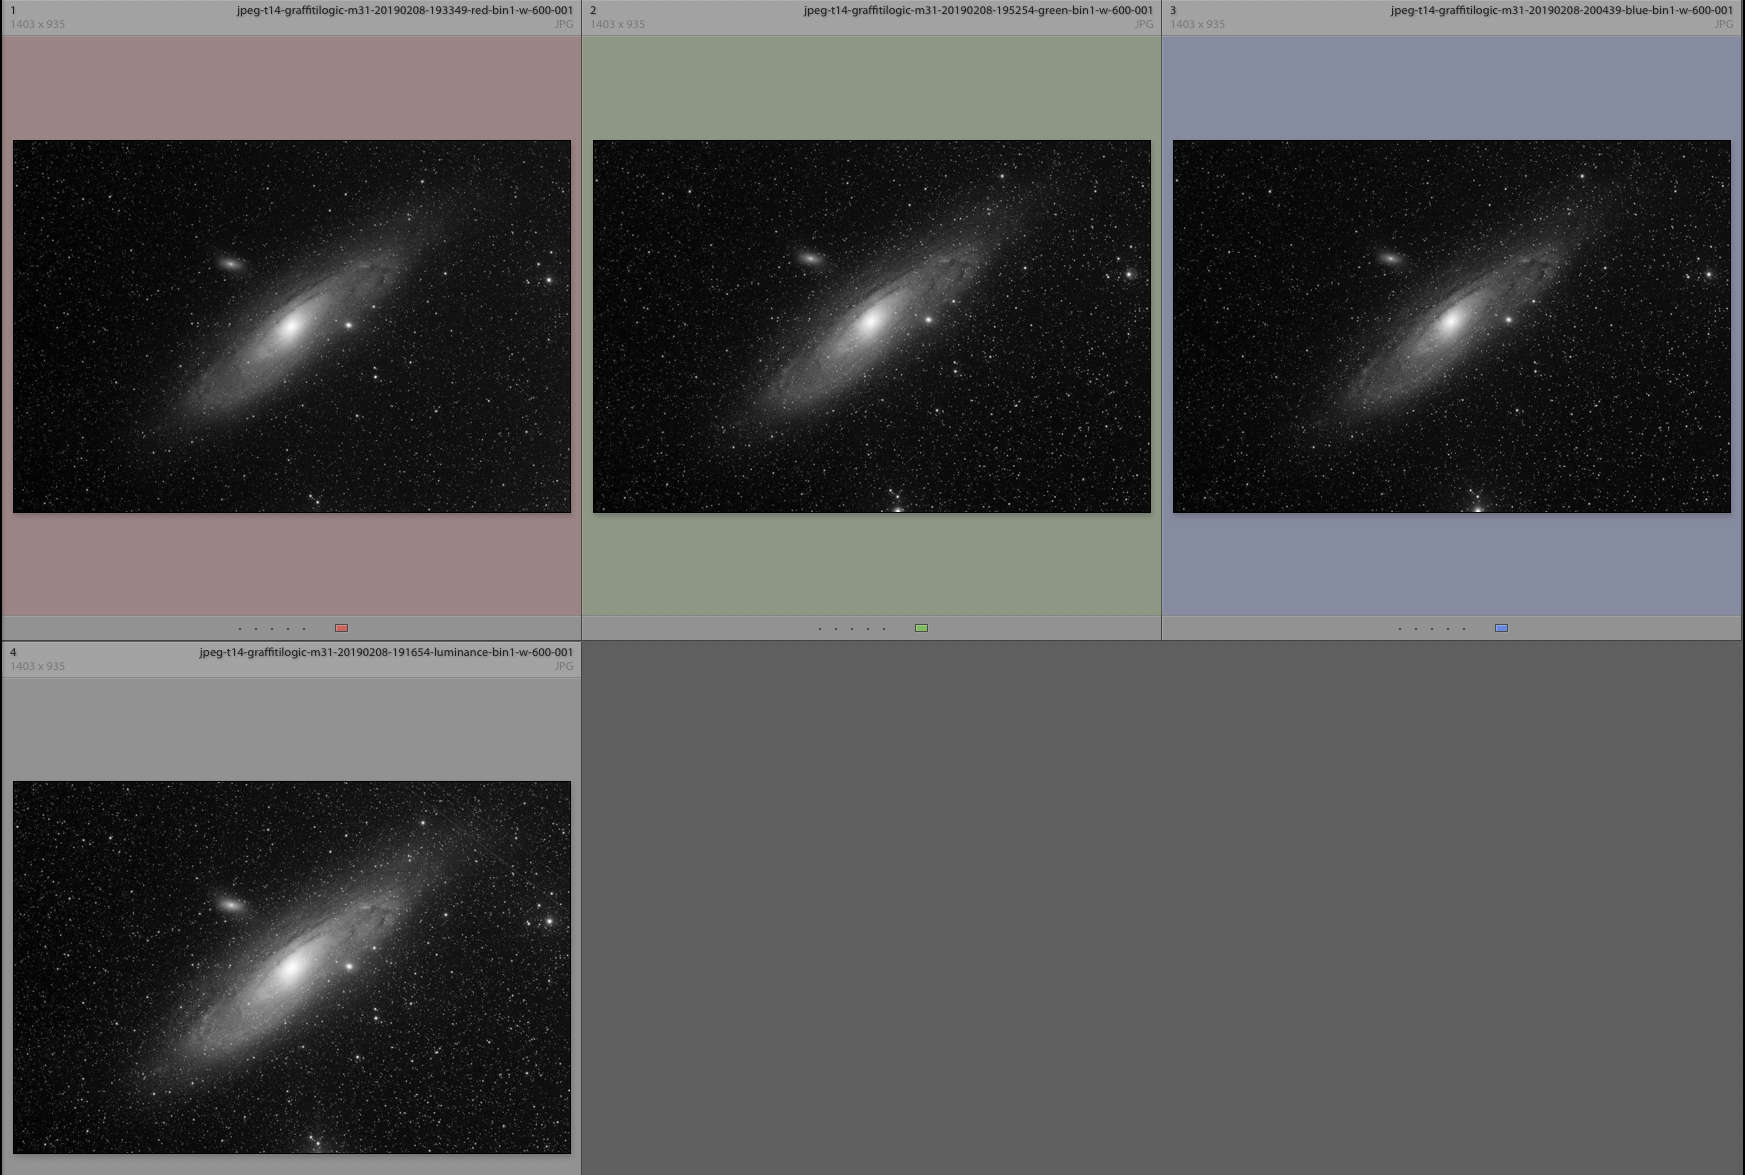
Telescope -> Red Filter -> Imaging Sensor -> RedGreyScale.jpg
Telescope -> Green Filter -> Imaging Sensor-> GreenGreyScale.jpg
Telescope -> Blue Filter -> Imaging Sensor -> BlueGreyScale.jpg
..and for extra credit..
Telescope -> Clear Filter -> Imaging Sensor -> LumenanceGreyScale.jpg
(and optional other filters that are targeted to certain atmospherics) (HA, OIII, etc)
When done, you have a greyscale image of your subject with a digital plate (so to speak) of each color. They get combined into a single image and BOOM: Color Deep Sky Images.
Quick Example:
I collected RGB(L) batches of 5 and 10 minute exposures of Andromeda (M31).
These were collected with Telescope 14 at NMS.
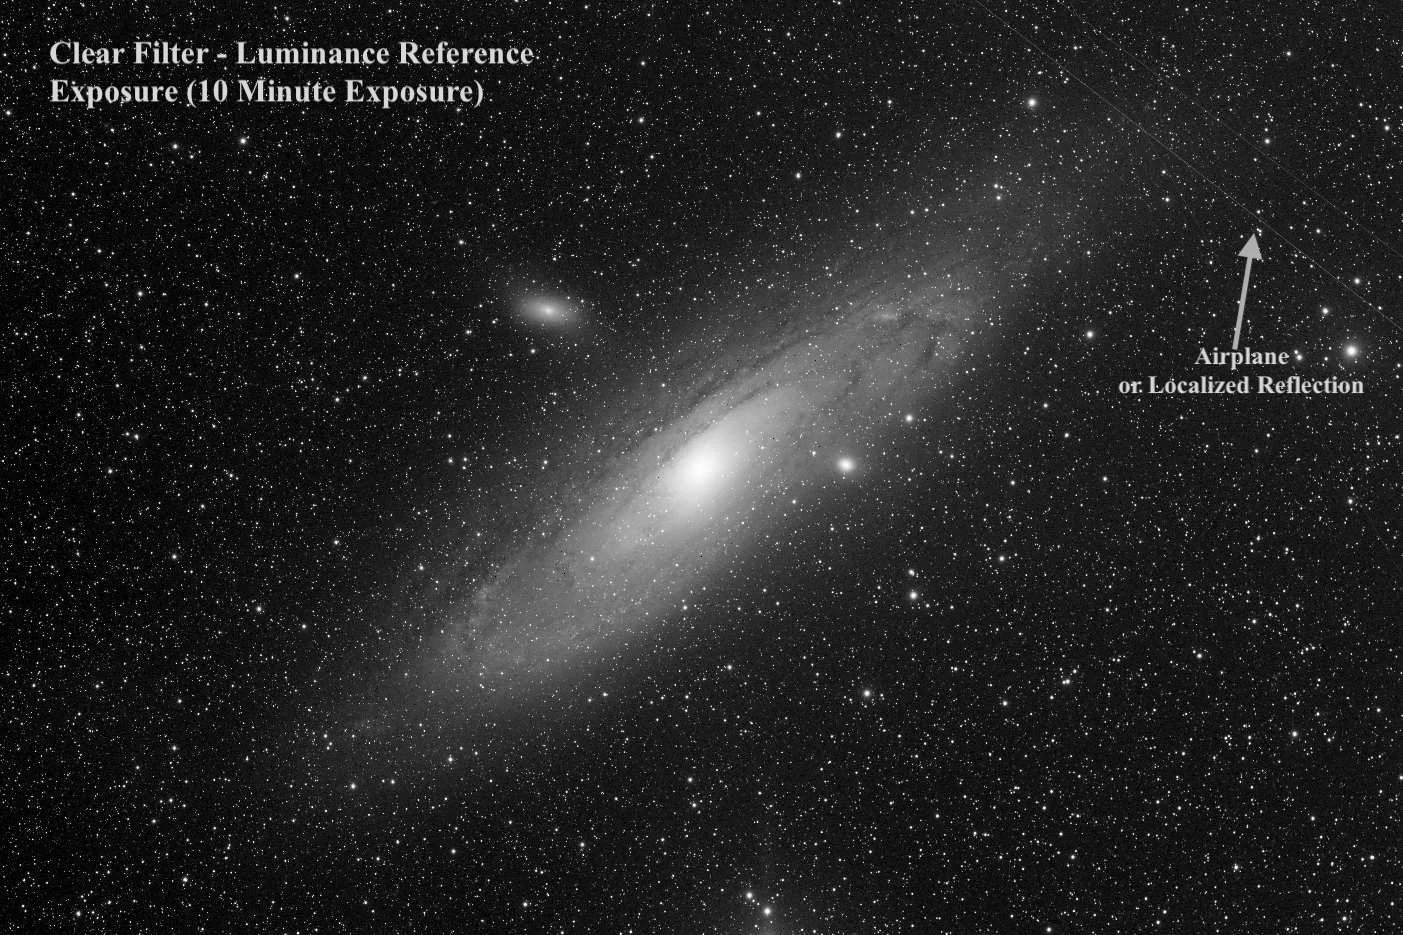
It was kind of a crappy time of year to shoot Andromeda from our hemisphere. Andromeda is only effectively visible from the observatory for a couple of hours when this was taken a few weeks ago. When Andromeda is at Zenith, it isn’t dark at the observing location yet.
The 10 megapixel SBIG STL11000M CCD Imager on T14 will spit out JPEGs, FIT and TIFF files from the imaging mission. They will typically need some slight alignment and I do this (in this case) by bringing them in as layers in Photoshop and manually aligning them.
Stacking software can do this for you and sometimes photoshop auto-align-layers can get it right but not always.

Once you have your aligned images, it is quite simple. You map each still to the color-corresponding channel on a new image of the same resolution (RGB 16 bit color in this case). This will be your RGB layer. Then you paste in your Luminance still as a separate layer and get your layer-blend-on!

Short exposure times, limited sampling of images (only 4 and a couple spares) and suboptimal transit period results in an okay-quality of detail out of the result. I still ended up framing the image with a tilt-shift filter in order to make the disc seem sharper than it actually is by comparison (and for artsy-fartsy reasons).
There you have it. Black and White to Color. Space Color!